
The setup

- 3 x 3 portable Battlefield
- 500 Points per each side.
- Best of 3 on games using randomly drawn Open War cards.
- If going on round 3, both armies will draw a ruse and a sudden death card instead of a normal objective card.
The armies

Space Wolfs Patrol Detachment
- HQ: Wolf Guard Battle Leader (Stormbolter, Power Axe)
- Troop: Blood Claws
- Blood Claw Wolf Guard Leader (Chainsword, Bolt Pistol)
- Blood Claw Pack Leader (Power Fist, Bolt Pistol)
- 4x Blood Claws (Chainsword, Bolt Pistol)
- Troop: Grey Hunters
- Grey Hunter Wolf Guard Leader (Combi-melta, Chainsword)
- Grey Hunter Pack Leader (Power Fist, Boltgun)
- Grey Hunter with Special Weapon (Plasma Gun, Chainsword)
- 3x Grey Hunters (Bolter, Chainsword)
- Fast Attack: Thunderwolf Cavalry
- Thunderwolf Cavalry Pack Leader (Power Axe, Stormshield)
- 2x Thunderwolf Cavalry (Thunderhammer, Stormshield)

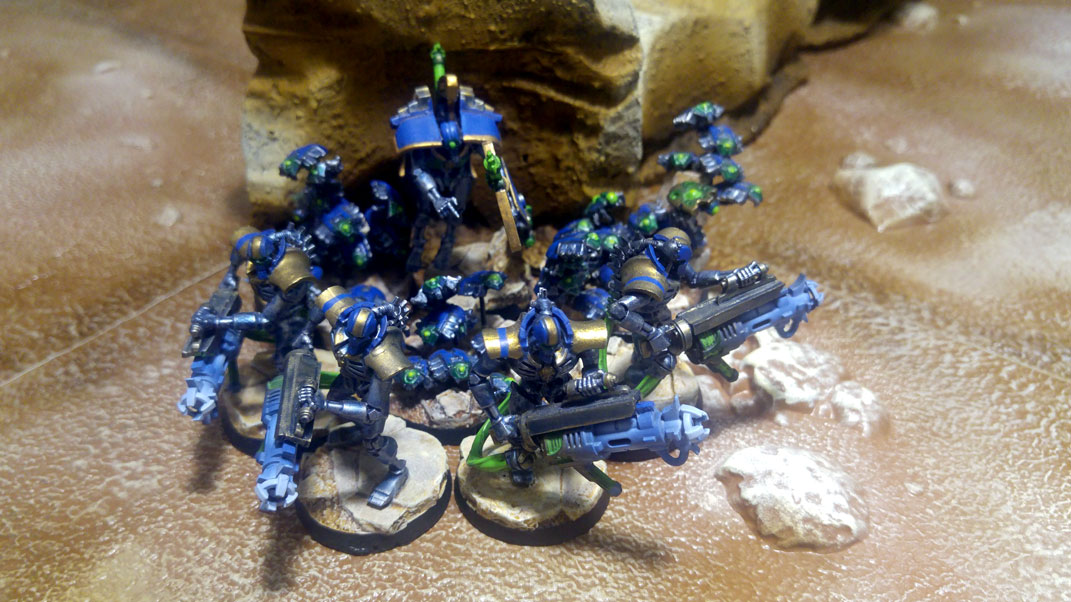
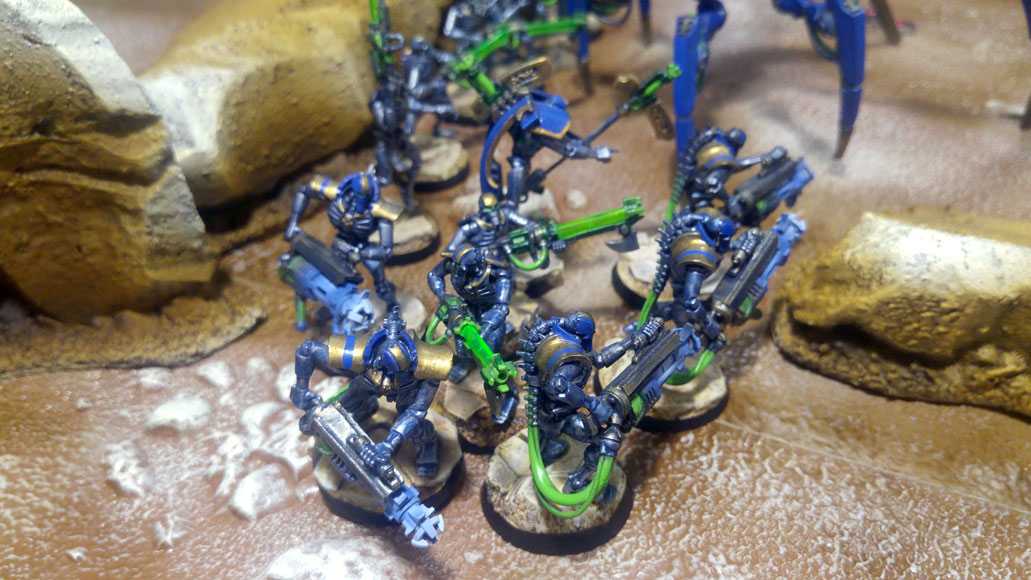
Necron Patrol Detachment
- HQ: Cryptek (Staff of Light)
- Troop: 10x Necron Warriors (Gauss Flayer)
- Troop: 10x Necron Immortals (Tesla Carbine)
- Fast Attack: 3x Scarab Swarms
- Elite: Triarch Stalker (Particle Shredder)
Game 1 – The Battlefield

The first battlefield is marked by walls that separate it into several quadrants.
Game 1 – The mission

- The mission deployment is the "Brazil flag" one where one player deploys in the middle and the second player deploys in the croners.
- The mission itself is "Kill the courier", where each player selects an enemy model and, if they kill that model, they win the battle. This puts a huge weight on deployment and initiative because players select the target model after deployment.
- With the Grudge Match twist, no Morale Tests would be made in this game.
This game would prove to be a chess-like game of positioning, especially given the type of deployment and mission.
Game 1 – Deployment

Deployment
Space Wolves win and elect Necrons to deploy in the middle, aiming at having a turn one charge against any unit they deploy there. Since they have a +1 bonus to initiative due to finishing their deployment first they are confident that the Thunderwolf Cavalry can eliminate anything but the Stalker turn 1.

Necrons Start by putting the Cryptek against the rock in the center.

Space Wolves deploy the Grey Hunter squad hidden behind containers in the southwest corner.

Necrons surround the cryptek with scarabs.

Blood Claws deploy on the northwest corner, behind a rock.
Immortals form another circle around the Cryptek and scarabs.

The Wolf Guard Battle Leader deploys near the Blood Claws, hidden behind the rock.

A layer of Necron Warriors deploy. Both Players holding their big units to the end. If the Warriors are charged turn 1 they at least may survive due to the Grudge Match twist that prevents them failing morale saves. From the Necron units available, they are the most survivable at this point with 10 wounds with a T4, 4+ save.

The Space Wolf player is forced to deploy his Thunderwolf Cavalry and does so on the southeast corner, attacking the Necrons from three different directions.

The Necrons deploy the Triarch Stalker, the only unit that can withstand a Thunderwolf charge, to counter their deployment.

The Space Wolfs declare this Necron Warrior as the enemy Courrier, knowing that any of his units are fully capable of wiping out the Warrior squad.

The Necron player declares this white thunderwolf as their target, knowing that they will live or die by killing this unit, especially with a deployment that puts them right up at minimal distance like this.
Game 1 – Turn 1

Turn 1 (Initiative)
Necrons win initiativem even with the +1 bonus from the Space Wolves for finishing their deployment first.

The Triarch Stalker lurches forward to challenge the Thunderwolves.

The rest of the Necron formation moves in as to protect the warriors from the Thunderwolves, with Scarabs and Immortals getting in front of that lethal charge. They also make sure to move away from the Bloodclaws in the northwest.

The Triarch Stalker fails at wounding the Thunderwolves, that save the only inflicted wound.

The Necron Immortals, however, manage to inflict 6 wounds, of which 2 fail at their saves and the first wolf suffers 2 damage.

The Warriors then open up on them and score 4 wounds, with a single failed save the first Thunderwolf is killed. Two to go!

The Triarch Stalker charges the Wolves and fails to hit with all but one attack, that is saved against.

In their counter-attack, the Thunderwolves inflict only a single wound, with Quantum Shielding proving to be a challenge even for the damage 3 Thunderhammers.

The Blood Claws and Wolf Battle Leader both advance 6+5 inches, moving to close the distance to the Necron Formation for a charge.

The Grey Hunters move forward and fail to deliver many wounds on the Immortals. They are the biggest threat to the Thunderwolves and must be killed.

A single Immortal falls.

The Thunderwolves dish out 4 wounds on the Stalker, with the flurry of claws and teeth from the Wolves doing the most damage, while Thunderhammers still suffer from Quantum Shielding blocking their potential.

The Triarch finally smashes the second Thunderwolf dealing 2 damage to it despite a commands re-roll on the save throw.
Game 1 – Turn 2

The Triarch Stalker regenerates 1 wound due to its Living Metal ability and Falls Back from combat, leaving the Thunderwolves exposed.

The Scarab Swarms move forward, denying the Wolves any path to advance.

The fallen Immortal comes back due to Reanimation Protocols.

The Necron Warriors retreat further behind the Stalker for protection.
The Immortals surround the exposed Warriors.

Necron Warriors open up a rain of Gauss fire on the Thunderwolves, inflicting 8 wounds. Using a Command Re-roll they make 6 saves. The White Wolf stands alone as his packmate falls, and he will have to survive the Tesla Immortals barrage now. A Tall ordeal.

The Immortals score 11 hits, rolling 3 sixes and totaling 17 hits with Strength 5 weapons.

After wounds are dealt the Wolf fails several saving throws and is felled, the Necrons have killed the Courrier and grab a victory on Game 1!
Game 1 – Necron Victory!
Game 2 – The Battlefield

The second Battlefield is more open for movement with blocks of terrain surrounding the center.
Game 2 – The Mission

- The Deployment is very close-quarters, but equal for both sides.
- The mission is to place 3 objectives and fight for their control at the end of turn 5.
- The twist is that it's a "meeting battle" and players must divide their forces in 3 contingents.
- The first ones starts the battle deployed.
- The second one arrives at the end of the second turn's movement phase.
- The third one arrives at the end of the third turn's movement phase.
Another very interesting game of chess-like deployment and positioning, since each contongent may arrive anywhere on the board 9'' away from enemy models and 9'' of a board edge, as long as it starts outside of enemy deployment zones.

The players roll off and the Space Wolf player will deploy and place the first objective. This also means he would once more claim the +1 bonus on the initiative roll.

The space wolfs place their objective on a raised rock outcrop near an armored container.

The Necrons place theirs in the middle on their deployment zone, seeking to keep a central position to draw the wolves to them.
Game 2 – Deployment

The space wolfs first contingent is comprised of the Grey Hunters and will deploy in the battlefield.

The second contingent has the Blood Claws and Wolf Guard Battle Leader, ready to come in at the second turn.

The third turn contingent has the three Thunderwolf Cavalry.

The first contingent for the Necrons are the Immortals and Triarch Stalker.

Arriving on the second turn are the Warriors, led by the Cryptek.

At last, the third Necron contingent are the three scarab swarms.

Having won the deployment roll, the Grey Hunters deploy near their objective, hiddeen behind the armored container.

The Necrons deploy right at the middle of the Battlefield, claiming their objective and threatening the center of the table.
Game 2 – Turn 1

The Space Wolves secure the Initiative, but elect the Necrons to play first, intent on countering their contingents arrival and securing the last claim over objective control.

The Necron first turn is incredibly fast as they simply sit tight in formation.

The space wolves, in return, move no longer than an Inch, with no solid lines of fire nor a chance of threatening Immortals or Stalker.
Game 2 – Turn 2

On their second turn the Necrons spark to life and move forward.

At the end of their movement the unit of Warriors and the Cryptek arrive from reserves, deploying at the center of the board on the southern flank.

The Necron Warriors can trace some firelines to the Grey Hunter squad hidden in their deployment..

They manage to score 5 wounds with their AP -1 flayers, that in turn kill two Grey Hunters.

The Grey Hunters finally move out from their cover to draw line of fire on the warriors.

The reinforcements arrive from the edge of the board 9'' away from the line of Warriors.

All units hold their fire as they know that any casualties would make charging all but impossible. The Wolf Guard Battle leader is the first one to charge against the warriors, counting on his 2+ save and 5 wounds to soak up the Overwatch and keep the Blood Claws at their maximum efficiency.

The Necron Warriors hit the Wolf Guard 5 times, wounding 3, but he saves all on his terminator armor.

He makes it in with a perfect 9'' charge and engages the warriors.

Their Battle Leader is quickly followed by the Blood Claws with a 10'' charge. The Grey Hunters fail their charge roll and remain far behind.

The Power Fist pack leader kills 2 warriors and his packmates finish off another 4.

The Wolf Battle Leader kills off 3 more warriors after hitting all of his attacks and wounding 3.

A single Necron Warrior is left standing. Had the Wolf Player attacked first with his Wolf Guard and later with his Blood Claws he could have consolidated in a way to deny Reanimation Protocols, but this mistake means that they will stay... and return.

The Necron player spens two command points for Insane Bravery stratagem, preventing the last Warrior to be lost to morale.
Game 2 – Turn 3

A total of 6 Necron Warriors make their reanimation protocols.

Only four of them can legally be placed on the Battleffield, however.

The Cryptek moves back as the Warriors fall back from the Blood Claws.

The Triarch Stalker moves into position to prey on the Space Wolves with Immortals following it closely behind.

At the northenmost flank, the Scarab swarms arrive in a way to deny the Thunderwolves an easy path to the Immortals.

The Triarch Stalker's shooting kills two Blood Claws, the Immortals kill off another three with their Tesla Carbines, always a major threat to everything on the board.

The Cryptek finishes off the Squad by killing the Pack Leader.

The Stalker Charges the Wolf Guard Battle leader but fails to wound him, the seasoned warrior deals a wound on the walker.

The Grey Hunters move in to shoot at the warriors and charge the Stalker. These wolves have teeth as they are all equipped with Chainswords, posing a threat of similar levels as the Blood Claws that were killed where they stand.

The Thunderwolf Cavalry arrives to clean up the Scarabs.

The Wolf Guard pack leader fires his combi melta and kills off two Necron Warriors.

The Plasmagun fires off and uses a Command re-roll to wound, killing two more warriors and leaving a single one left alive.

The Bolters deal two wounds to the Warrior squad but even after a command re-roll they are removed from the table.

After dispatching the Necron Warriors, the Grey Hunters charge the Triarch Stalker.

Using a command re-roll, the Thunderwolves connect their charge.

The Thunderwolves inflict 2 unsaved wounds and their riders deal another three, killing off one Scarab Swarm and leaving the other on a single wound left. They suffer one wound in retaliation.

The Grey Hunter squad deals 3 wounds to the Stalker and receive none in return.
Game 2 – Turn 4

The Stalker falls back towards the Thunderwolves, leaving the Blood Claws open for the Immortals.

Fearing the Thunderwolves, the Immortals advance to get away.

The Cryptek also advances to close his distance to the Immortals.

They both gather amidst these barrels on the southern edge of the Battlefield.

The Immortals deliver only 3 wounds to the Grey Hunters in an inefficient Shooting Phase. They are all saved against.

The Cryptek manages to fell one Grey Hunter with his Staff of Light.

The Thunderwolves wipe out the Scarabs in the Fight Phase unscathed, something that the Necron Player was hoping wouldn't happen.

They consolidate towards the Necron Line. A subsequent Charge is all but innevitable.

On the Space Wolf turn the Thunderwolves move in for the kill.

The Grey Hunters and Wolf Guard Battle Leader move in and start to wipe out the Immortals. They are harder in their defense and a single one is killed by the Plasmagun.

The Wolf Guard Battle Leader once more leads the Charge, soaking up all Overwatch on his terminator armor.

The Grey Hunters manage a long 11'' charge and go take their business with the Cryptek hiding in the back.

The Thunderwolves make it in, multi-charging the Stalker and Immortals.

The Wolf Guard Battle Leader kills off 3 Immortals with his Power Axe.

The Cryptek receives three wounds in combat, two of them from the sergeant with the Powerfist.

The Thunderwolf rider with Power Axe delivers the last blow to the immortals, wiping the unit.

Re-rolling wound rolls because of their leader, the Thunderwolves start to hammer down the Necron Walker, that fails to wound the Thunderwolves
Game 2 – Turn 5

The Final round rolls in and the Cryptek deals a fatal blow with his Staff of Light on the Plasma Grey Hunter.

The wounded Triarch Stalker only manages a single hit, dealing a wound to the Thunderwolfs.

The Power Fist sergeant finally mauls down the Cryptek.

The Triarch Stalker is defeated in combat.
The Space wolves not only wiped out the Necrons, but they had control of the central objective while their enemies had none.
Game 2 – Space Wolf Victory!
Game 3 – The Battlefield

For the final Battle the Battlefield offers some cool walls that run diagonally to the board edges.
Game 3 – The mission

- For this final mission both players received a secret Ruse and Sudden Death cards.
- The Ruse cards gives them some secret ability that can be used during the battle.
- The Sudden Death card gives them a secret objective to complete!
Neither players knew what their opponent had to do to win. The deployment separates each force into the corners. This would an exciting game!
Game 3 – Deployment

The Necron player wins the Deployment Roll-off, meaning that they would get the +1 to initiative rolls this time.

The Necrons select the walled-off deployment and set up their Immortals behind the armored container.

The Grey Hunters deploy behind the rocky outcrop, safely in cover.

The Triarch Stalker, as it has nothing to fear from, deploys right at the center of the battlefield.

The Battle Guard Leader deploys behind his Grey Hunters.

Seeing the Space Wolves deploy in such a defensive stance, the Necron Warriors are deployed out in the center of the Battlefield.

The Blood Claws keep up the defensive deployment. Both players agree to ignore minor gap between the two rock terrain pieces and consider them as one piece of solid line of sight blocking terrain.

The Scarabs and Cryptek deploy amidst the Necron forces.

The Thunderwolves deploy as far away as possible.
Game 3 – Turn 1

Necrons win the Initiative roll.

Having no clear line of sight or range, the Necrons decide to let the Space Wolves go first. As expected, they simply stand still, waiting for the Necrons to come to them.

The Triarch Stalker moves in to gain some shots on the Wolves hugging the wall.

All the other Necrons advance, with the Scarabs unfortunatelly rolling a 1 on their advance roll.

The Immortals scale up and down the walls.

The Triarch Stalker funbles his shots and manages a single kill on the Blood Claws.
Game 3 – Turn 2

The Space Wolves are resolute on standing their ground and don't move at all, save for the Thunderwolves whom join their brethren in behind the rocks.

All Space Wolf units open fire on the Triarch Stalker inflicting a total of 5 wounds.

The Stalker moves in after regenerating a wound and going back to maximum efficiency.

The scarabs advance and circle around the Space Wolves formation.

The Immortals can draw fire to the Wolf Guard Battle Leader, whom is eager to receive their barrage of Tesla Shots inflicting a single wound on the HQ.

The Triarch Stalker kills off two Grey Hunters and declares a charge on the squad.

The Stalker fails to connect its attacks and receives no damage in retaliation as its Quantum Shielding ignores the damage output from the sergeant's Power Fist.
Game 3 – Turn 3

If the Necrons so eagerly come, the Space Wolves will not deny them a fight! The Thunderwolf Cavalry and their Wolf Guard Battle Leader swing off from behind the Rocks.

The Grey Hunters prepare to shoot down the Scarabs at Rapid Fire Range.

They melted pretty fast, the Multimelta from their Wolf Guard pack leader killing off an entire base on his own.

Suffering no wounds from Overwatch, the Wolf Guard Battle Leader dispatches three Immortals with his Power Axe.

The Thunderwolves wipe out the rest of the Immortals and make huge casualties on the Warriors.

They consolidate into the Cryptek to tie him in and he fails to wound the single hit he makes against the Thunderwolves.

The reanimation protocols bring 3 warriors back as they fall back with the Cryptek to leave the Thunderwolves exposed.

The Necron player reveals his ruse card "Tactical Reserves", that allows him to bring back a unit that has been killed on a previous turn back into the battle.

The Squad of 10 Immortals shows up behind the Space Wolf force, ready to shoot at their backs.

They make a powerful shooting attack of 10 hits, 5 of which are sixes that generate a total of 20 wounds aimed at the Wolf Guard Battle Leader.

Shooting at a 2+ save with AP- weapons is, however, fruitless, as the Battle Leader fails a single armor save from the 15 he made!

The Wolf Guard Battle Leader soaks up a killer amount of Gauss Fire, situation is not looking good for the Necrons.

The Triarch Stalker fails yet again to hit the Blood Claws consistently and takes a Chainsword wound in retaliation.
Game 3 – Turn 4

The Wolf Guard Battle Leader prepares a charge on the Immortals that came in last turn.

The Thunderwolves circle around the rest of the Necron infantry in the middle of the board.

The Blood Claws fall back and open space for the Grey Hunters to fire in.

Where the Combi-melta fails to go through Quantum Shielding, bolter fire manages to score 2 more wounds on the walker, crippling his ability to fight consistently.

The Wolf Guard Battle Leader kills off one Immortal with his Storm Bolter.

The Blood Claws charge in and one is killed in Overwatch.

Another wound makes it through the Terminator armor in Overwatch. The Wolf Guard Battle Leader only has 2 left now.

Using a command re-roll he makes an 8'' charge.

The Wolf Guard Battle Leader kills two more Immortals in close combat with his Power Axe.

The Triarch Stalker is taken down by the fury of the Grey Hunters when a solid Powerfist wound finally makes it through the Quantum Shielding and takes it out of action.

The Thunderwolves kill off two warriors and inflict three wounds on the Cryptek, but lose one packmate to their counter-attack.

The Necron Warriors fail their morale test and phase out for emergency repairs, leaving the Cryptek standing alone.

On the Necron turn there was no place to run. The Cryptek and lone Immortal were wiped out by the Space Wolves.
Game 3 – Secret Objectives

The Necron Objective was simple: Kill 2 Space Wolf Units. They had hoped that the Blood Claws would fall and would then select a secondary target. When the Wolf Guard Battle Leader was shot by the Immortals they felt like that was it but his incredible saves foiled that plan.

Had the Space Wolves HQ been killed, they would have used the Revenge! Ruse to gain a +1 bonus to wound rolls across the army.
His Sudden Death card, however, was Endure, meaning he just needed one model left at the end of turn 5. He did a good strategy of baiting the Necrons out of position and claimed a solid vicotry!
Game 3 – Space Wolf Victory!
Wrap up
What an intense gaming evening that was! We closed off these games in under 3 hours. This proves that even with small forces and a small gaming board the Open War Deck is one of the greatest products out of 8th edition Warhammer so far!